Showing posts with label Accents and Rebounds. Show all posts

Wednesday, August 19, 2020

Stick Control with Flams

I could pretty much just leave you with the title.  Because that's exactly what I'm suggesting: play Stick Control as flams.  At least the first few pages.

Why?  Because it incorporates all four common strokes, and is therefore a great way to practice them naturally, using a lot of muscle memory that you already have built in.  We're used to keeping grace notes low, bringing them up for primary notes, playing primary notes as downstrokes in preparation for grace notes, etc. etc.  So let's use that to our advantage.

Let's break a couple of them down as we did when we looked at how to practice flam rudiments.

For example, number one is just a single stroke roll.  That will now become hand to hand flams.  Think about what each hand will be doing individually.  The right hand starts with a primary note which will be a down stroke so that it is low and ready to play the next grace note.  That grace note will be an upstroke so you're ready for the next primary note.  Therefore our right hand will play DOWN, UP, DOWN, UP, repeatedly.  The left hand will do the same, but starting with an upstroke.

Let's skip now to number 3, which is a double stroke roll, meaning we'll play two right flams followed by two left flams.  The first stroke will be a full stroke as it is a primary note followed by another primary note.  That second primary note, however, will be a down stroke in preparation for the grace note that follows.  The grace note will be a tap since it's followed by another grace note, and the second grace note will be an up stroke to get ready to circle back around to the first primary note again.  So, in this example our right hand will play FULL, DOWN, TAP, UP.

So, as you go through each one take a moment to think about what each hand is playing.  Chances are you won't find it terribly difficult because as I mentioned earlier a lot of the motions will be built in through muscle memory anyway.  But putting your focus on it will improve your stroke control in other applications outside of flams.

Friday, April 10, 2020

How to practice flam rudiments

Just about every high school drumline has an exercise that looks something like this.


But I think it's often unclear to students, and poorly explained by instructors, as to what the purpose of this exercise is.  So I thought it would be good to pull this apart a little bit as, when done properly, it can be a very beneficial exercise, and can apply to any flam rudiment.

The basic gist of the exercise above is that the first two bars are what your hands are playing individually when playing flam accents.  But what has always bugged me is that the right and left hands are notated the same.  A better representation would be to play what the right hand actually plays, then what the left hand actually plays before putting it together.  From there you could play the whole exercise off the left if you wished.  Here's what that would look like.


To separate the hands and see what each one is doing is all well and good, but we can get more out of this.  In a flam passage such as this it can be easy to get lazy with the notes in-between the accents and/or flams.  These notes are often referred to as the "inner-beats". Which leads us to another drumline buzz-phrase: "watch the inner beats".  I heard/hear this time and time again, but again, it is rarely explained.  To "watch the inner beats" is to NOT be lazy with the notes in-between the accents and/or flams.  And better yet, we can break them down and practice them in a focused manner.  Let's try it with Flam Paradiddles this time.

Below are flam paradiddles followed by the rhythm played by each hand.


This time around, rather than just playing those rhythms as written, let's "clean up the inner beats" by breaking down the mechanics of each hand before putting them together.  To do this we'll look at the Strokings™ ala Accents and Rebounds.

On the right hand we begin with a downstroke so that our hand remains low for the next three tap strokes, which are followed by an upstroke in preparation for the next downstroke.


The left hand plays the same thing, but as it is displaced by a beat we begin with a tap stroke, followed by an upstroke again in preparation for the accent, which will be a downstroke so we're ready to play the next three tap strokes.


This may all seem a bit pedantic, but if you find that your flam passages are a bit "mushy", this will certainly clean them up, and by breaking down the mechanics of our motion we can build speed and efficiency.

Remember that this can be applied to any flam rudiment.  Note what each hand plays alone, figure out the strokings, and play them slowly before putting them back together.

Wednesday, March 25, 2020

Triplet Double-Paradiddle Study w/ Accents and Diddles

Here's a little snare study that developed out of an improv session on the pad in the back yard yesterday.  I was playing double paradiddles in triplets and moving the accents around while trying to vocalize the pulse, which in itself can be difficult and we will chat about in a future post.  After adding some diddles my OCD took over making me want to organize it into some sort of system and symmetry.  Once I conceptualized it and wrote it down I found that parts of it were deceptively difficult for two main reasons:

1. the change in double stroke speed between the 16th notes and the 8th notes of the double paradiddle can be tricky depending on where the 16th notes fall.

2.  the "strokings" (not stickings; see this post) are not always natural in the various permutations found in the study.


Maybe it goes without saying, but I'd recommend slowing this way down and really working out the proper strokings, ala Accents and Rebounds.

Wednesday, October 02, 2019

Articulation Control with Paradiddles

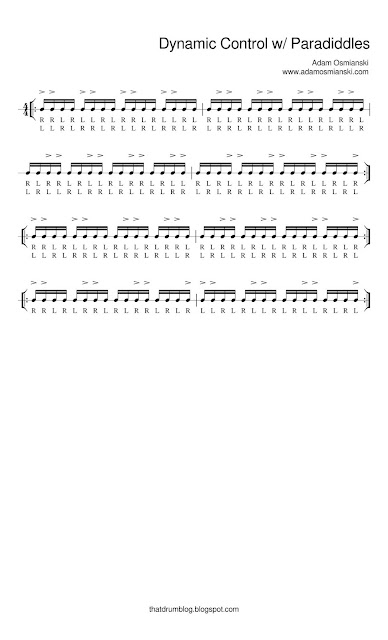
At the moment I have a couple of students working on Wilcoxon’s “Paradiddle Johnnie” from “Modern Rudimental Swing Solos”.  Both of them are playing really well, but are finding it difficult to control their stick heights/volume so that there is only two distinct levels of sound - accent and unaccented.

In passages such as this one, in “Paradiddle Johnnie”…


…the students are unintentionally producing a third sound by giving additional weight, or emphasis to unaccented notes that fall on a downbeat.  What comes out is a sound that is softer than an accent, but louder that a tap stroke.

So, to help remedy this, I whipped up a simple paradiddle exercise that isolates those phrases, and other ones similar to it.


Monday, June 25, 2018

How to shift/displace the metronome

YouTube and other drumming blogs are awash with posts recommending that we try to displace the metronome - i.e. make the click feel as though it is on a part of the beat other than the downbeat - as a way of strengthening our awareness of musical time.  I’m totally for this idea, but the one thing usually left out of these posts is exactly how one goes about doing that.

To feel the metronome on the downbeat is quite natural.  Most people, musician or otherwise, can feel a beat and tap their foot along with it.  Even feeling the metronome on the upbeats isn’t too terribly difficult for most.  I’ve been able to have pretty young students feel the metronome as “&” simply by having them click their sticks or clap their hands on what they initially feel as the upbeat and then start counting “ONE, TWO, THREE, FOUR” out loud on those beats.  But from there things get significantly more difficult.  Even when I was already a somewhat decent player, probably in music college sometime, I tried this idea by attempting to feel the metronome as “e”, and found it difficult at first.  I had to teach myself how to feel the metronome there.

If you’re simply struggling to get started but can then keep your ear tuned in on the metronome as “e”, the easiest approach is to simply listen to a few clicks of the metronome to find the tempo, turn the metronome off, start counting “one, e, &, a….” at that tempo and then hit start on the “e”.  Chances are your ears will grab it right away.

But if this concept is completely new to you it may be significantly more difficult to get going.  If you find yourself in this boat, give this a try:

1. Turn your metronome on at a reasonably slow tempo, maybe in the 60 bpm range, and simply feel it wherever you naturally feel it, which will probably be the downbeat.  In these examples the arrow will represent the metronome clicks.


2.  Start playing steady 16th notes with no articulation.  Start with your weaker hand which is more likely to play on the “e” under normal circumstances.


3.  Next, start counting out loud starting on “e”:  “e, &, a, 1, e, &, a, 1”.  Even if your mind's ear is still feeling it is “1, e, &, a” that’s OK.  Just keep pressing on with “e, &, a, 1”


4.  Now, play accents with the metronome click while still counting “e, &, a 1” out loud.  Again, this should be your weak hand.


5.  Then, accent the note where you are saying “One”.


6.  This is where the mental switch happens for many people.  So, hopefully by this point you are now feeling it like this:


...which is identical to the previous example, but hopefully your mind’s ear has flipped it over so that the metronome now feels like “e” instead of you just saying it.

7.  If this concept is new to you it might be difficult to continue playing accents on “1” with the metronome on “e”.  If this is the case play it for one bar and then switch to accents on “e” for a bar which is a little bit easier to stick with.


This, of course, is only the beginning; a way to get started.  Some other suggestions to try with the metronome on "e", or any other less common placement of the metronome:

*play the accents on each of the various 16th notes with the metronome still on "e".
*different 16th note stickings (i.e. the first page of Stick Control), and various accent patterns (i.e. Accents and Rebounds)
*different rhythms utilizing quarter, 8th, 16th, 32nd notes
*reading snare solos
*playing drum set grooves

If you'd like all of the examples above on a single sheet, please e-mail me for a PDF.

Tuesday, July 18, 2017

How to Use "Accents and Rebounds"

Accents and Rebounds is the lesser-known, but equally as important and useful little brother of George L. Stone’s Stick Control.  It’s a great book, but if you’re just playing through the exercises within it like an “Accent Tap” exercise of a high school drumline, then you’re not quite realizing it’s full potential.

To get the most out of the book we must remember that there are four distinct strokes that make up the majority of drumming: The full stroke, the upstroke, the downstroke, and the low stroke or tap stroke.

The full stroke, as the name suggests, covers our full range of motion.  It begins from a raised position, is thrown down into the drum and allowed to rebound back up to the same position at which it started.  This gives us a nice full sound, and if we’re playing multiple high notes in a row, it saves us the trouble of having to lift the stick back up into playing position.

When using the downstroke, we stop the stick before it is allowed to rebound so that the stroke ends low to the head of the drum.  An important thing to remember is that until after the stick strikes the head there is absolutely no difference between a downstroke and a full stroke.  We throw the stick downward from a raised position and then apply a little pressure to the stick AFTER it strikes the head.  If you squeeze the stick before it hits the head you will choke off your sound, and in the long term probably hurt your wrists or forearms.  We use this stroke when we need a low stroke immediately following a larger stroke.  Without it, the stick would be in a raised position and we would first have to lower it before we could execute our low stroke.

The upstroke is the opposite of a downstroke.  This motion starts from a low position and ends up high.  Use as much rebound as you can to get the stick back up to the raised position, but you’ll most certainly need to give it a little help.  It’s not going to make it all the way to the top on it’s own.  Again, the use of the upstroke is the same as the downstroke, but in reverse.  If we need to play a larger, more powerful, stroke following a low stroke, putting that upward pop on it puts us in better position to execute the next stroke.

And last but not least the low stroke.  The low stroke, or tap, is essentially just a full stroke, but played at a much lower height.

As you’ve probably gathered, the whole purpose of these different strokes is to economize our motions as much as we can to maximize fluidity around the drums.

Let’s look at a practical application using paradiddles.  If we were to play each note of the paradiddle at the same volume, we would use full strokes, whether they be high or low.  But if we add an accent to the first note of each paradiddle, everything changes.

Our first note would need to be a downstroke, because we’d want to start high to achieve the accent, but we’d want to stop the stick low to the head in preparation for the next right hand which is low.  The second note would then be an upstroke.  It’s not accented, so we want it low, but the next note that hand will play, after the double strokes, will be an accent, so we need it up high.  And those two doubles will simply be low strokes.

So our paradiddles strokes would look like this:

F = full stroke
D = downstroke
U = upstroke
T = tap, or low stroke
To practice all four strokes in a row all we need is a bar of 8th notes with the first four accented and the second four unaccented.  The first two would be full strokes to prepare for the next two accents, the second two would be downstrokes to prepare for the first two low strokes, and the last two would be up strokes in preparation for the first two accents on the repeat.


If we apply this concept to Accents and Rebounds, the book becomes far more useful.

Let’s break down the first example:

1 - full stroke in preparation for the next right hand, which is accented
& of 1 - tap as it is unaccented, and so is the next left hand on the & of 2
2 - downstroke, as it is accented, but then needs to be low for the next right
& of 2 - upstroke in preparation for the accent it on the & of 3
3 - tap, as the right hand as no more accents in that bar
& of 3 - downstroke
4 - upstroke to prepare to start the pattern over again
& of 4 - tap
Of course, when the stickings change it also changes the type of stroke needed.  I went ahead and did the whole first page for you to get you started, because that’s the kind of guy I am.  E-mail me if you’d like a PDF.


In spending a little time breaking these examples down one stroke at a time and playing them really really slowly, focusing on the mechanics of each stroke, I found that my motions became smoother and more effortless, and as a result I got faster.  I recommend writing in the strokes and really focusing on them for awhile.  Eventually choosing the correct stroke to apply will become second nature and you’ll be able to move through the book more quickly.  Do be careful though, as much like Stick Control, you can easily go overboard with this and run it into complete tedium to the point where the amount of time you’re putting in is far disproportionate to the results you are getting.

Oh, and I've decided how I'm going to make my mark on the drumming world.  If R, L, and B are “stickings”, then F, D, U, and T shall henceforth be known as “strokings”.  July 18, 2017.  You heard it here first.